
Edit clauses and make your terms live
Check and edit each clause, set the acceptance wording, then move your draft to Approved and Live so customers sign it.
A document moves through three stages: draft, approved and live. Customers only sign the live version.
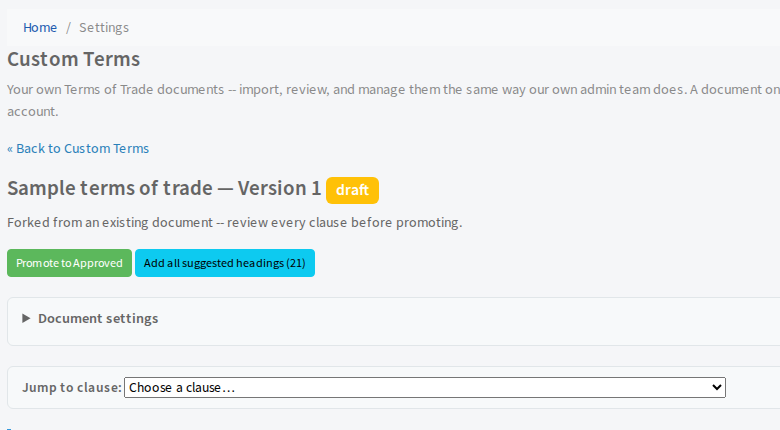
Edit a draft
- Open Settings, then Documents & Signing, then Custom Terms, and select View beside the draft.
- Use Jump to clause to go straight to a clause.
- Select Edit this clause under it. Type your changes in the box. Use
**bold**for bold text, press Enter for a line break and type[[slug]]to link to another clause. - Use the buttons above the box to drop in details that change per business: Short name, Company (legal name), Trading as, Address and ABN. Insert reference links to another clause.
- Select Preview to see the result, then Save clause.
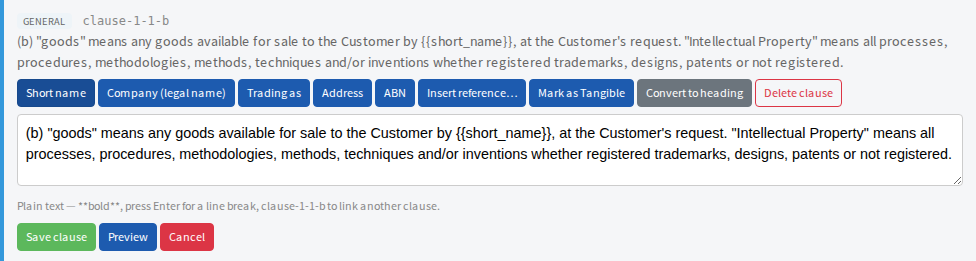
Other buttons: Mark as Tangible or Mark as General (tangible clauses cover physical goods), Convert to heading and Delete clause.
Document settings
Open Document settings to choose a Clause Profile: Full, or Services only (skip tangible clauses). You can also change the Consumer Acceptance Text and Commercial Acceptance Text, which is the sentence the customer ticks. Leave them blank to use the standard wording. These apply wherever the document is used, not only to this version.
Make it live
- Select Promote to Approved.
- Check it once more, then select Promote to Live. This replaces the version that is currently live.
If you spot a problem while it is approved, select Revert to Draft to edit again. You will need to approve it again before it can go live.
Change a live document later
Select Create new draft from this on the live version. Your changes stay in the draft until you promote it.
Choose which document a form uses
On the form's Accept Terms step, pick the document under Terms Plan. See Change the form your customers fill in.